Why use one color when you can blend in two to three colors or even spice it with glitters? Ombré fall nail type is known for making colors less boring and this nail fashion happens to be standing out.
These nails essentially speak for themselves in terms of class and uniqueness and they are one of the trendiest manicure looks this year.
Oh! how I love the precision and details the ombré fall nails give, it is all shades of beauty!
It is atheistic how the ombré fall nails can focus on multiple colors yet include uniquely different gradients of the same tinge along each nail. That’s one hell of an art if you ask me!
“They’re subtle but still so impactful, tonality is a modern way to experiment with color and express your style” Eleanor Langston a chief officer of NYC’s pant box Nail once said to “GMA”
-
Save
Indeed, most fall ombré nails help make your styling easier, from your choice of bag or shoes for an event or an outing. The ombre fall nails just know how to fit in to make the fashion subtle.
Travel nail artiste also said “ It easily satisfies the need to settle for a basic color while adding a bit of uniqueness for even the average nail enthusiast, it also presents a fun personal palette”
Table of Contents
How did the ombré nails come about?
Fall Ombré nails were originally known as “baby boomer nails” This name was based on the generation born after WWIS namely “the baby boomer” years.
When the classic French started in 1940 and became popular, it became a thing for people to paint their nails in pink and white according to a nail tech named Jade Tang.
A few nail technicians practiced baby boomer nails around 2010, However, the time for the original baby boomer creation is said to be unknown.
Although these designs blew up and became a trend in France and Germany in 2018 they then spread across the world and since then nail enthusiasts have explored, modified, and even created great new designs.
Are ombré nails still in vogue?
Yes of course they are! Even though ombre fall nails became popular in 2018, nail enthusiasts keep creating artistic new trends and we can not have enough of it.
Does the shape of my ombré nails matter?
Yes honey, the shape sure matters. Fall ombre nails come in different designs best suiting the user of these nails. Bear in mind that when nails are long they look better in subtle minimal nail color.
When nails are short they look better when the colours are dark and fierce.
How do I choose the perfect ombré nail color?
As you get more acquainted with the ombré fall nails world. It might be a bit tasking as you try to choose a perfect blend for your nails. Kidding! it’s not that tasking, Let’s go!
Before diving into it, one thing you must consider is your color choice, you don’t want to draw the wrong attention because yes! Ombre fall nails are attention grabbers so you should do it right.
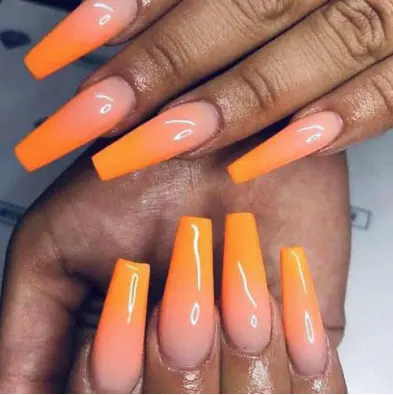
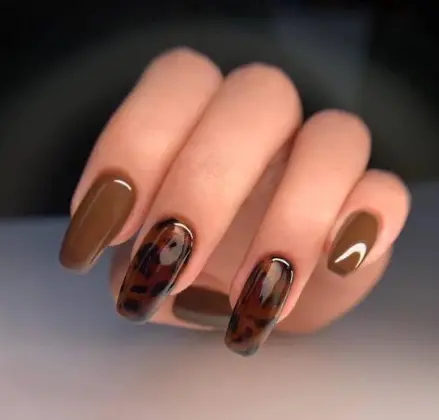
Wrong choices can also make you lose your confidence in public and that’s not what we want. So, you have to use colours that complement each other, Orange and nude, brown and nude. ,
Here are some examples of what they look like;
-
Save
-
Save
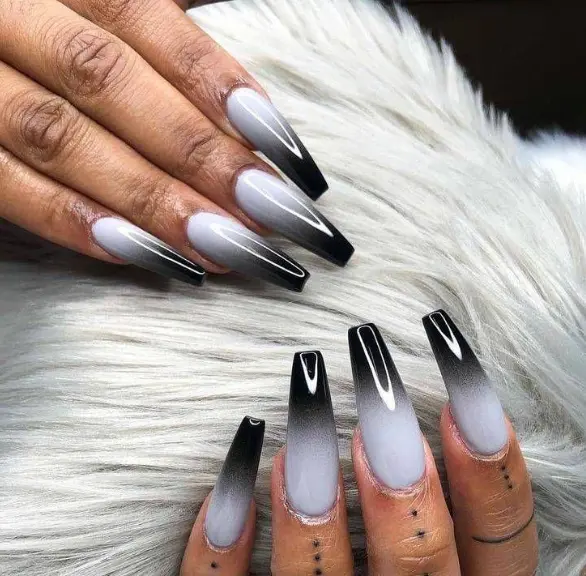
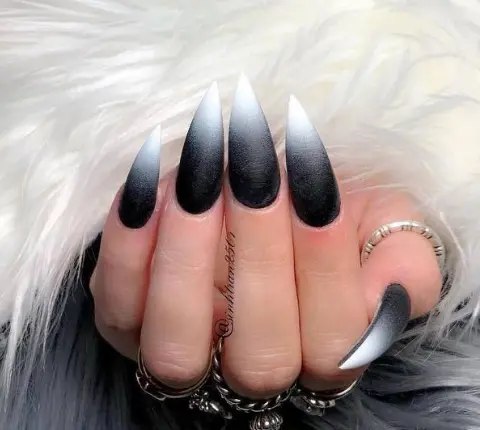
You’ll find these colors easy to blend and as you get better with the color blends you might want to consider trying bolder colours like black and white.
-
Save
If you ever considered what ombre fall dip nails would look like on you, I think it’ll look just perfect as far as you use the right colour for it.
-
Save
What kind of nail best fits ombre fall nails?
It doesn’t matter what kind of nails you are using, it all depends on your choice. Ombre fall nails come with different enhancements like gel, traditional lacquer, and dip acrylic.
You just have to pick what best suits you.
How to apply properly a fall ombre dip nail?
Steps on how to create a fall ombre dip nail are quite easy like I said before. This is also an opportunity to do something unique with your nails.
As we know ombre nails are a special type of manicure that creates great colour gradients.
Usually, it begins with a light color and further into darker colors.
It is only a matter of time and practice before you become a pro when creating these perfect dip ombre nails.
You May Also Like – 11 Trendy Square Fall Nails With Guide
Step 1: Get your nails ready
To begin this process it is important To prepare your natural nails. This means cleaning your natural nails to remove excess oil which will help ensure adhesion to give you a full ombre dip nails long-lasting wear.
Make use of a clipper to trim your nails until you have reached your desired length. After that, take notes of the cuticles and brush them back.
Step 2: Apply the first bond
After you have prepared your nails, you can start applying in the first layer of bond. Taking this step is to ensure that each subsequent layer will stay and form a tight seal.
This method is to make sure the nail bed is nourished, after that apply the first coat to all fingernails.
Step 3: Apply the second bond
This step is a bit different from the previous one, In this step you will need to apply the pond halfway onto the surface. You do not want to apply it to the entire surface of the nail.
Once you have started the base in the middle of the nail, continue to stroke it out towards the tip of the nail.
Step 4: It is time to dip the fall ombre nails
You will need to apply what is called clear or natural dipping powder which will help build the Apex.
Then, apply another layer of the base, you can now start the coloring process by dipping just the tip of the nail into the dipping powder.
Make sure to dip it into the powder up to a 45° angle, After that bring out the nail and get rid of the excess powder by simply tapping it out.
Step 5: Add your darker colours
At this step ensure you have a fluffy brush to apply the powder, you could use an eyeshadow brush, now you can start applying the darker powder to the surface of the nails.
Apply a layer of bond again starting from the middle of the nail and brush it out using the tip of the brush to dab the dark colour powder onto the tip of the nail.
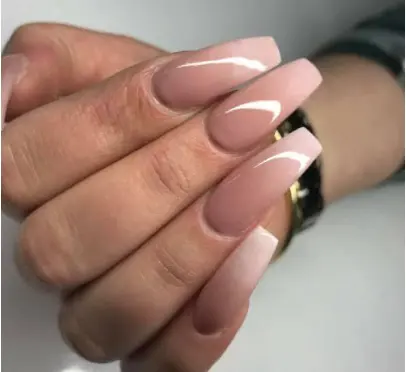
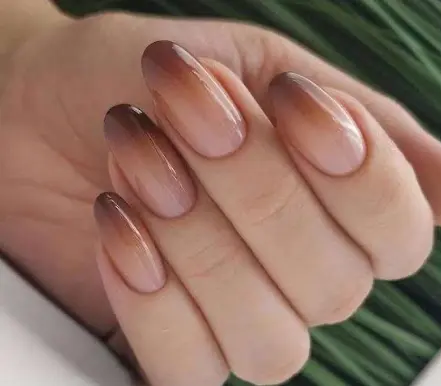
If you want more coverage then repeat steps 4 and 5 again. An example of a cool colour combination you might want to consider is nude and brown.
Brown at the tip or at the bottom, either ways you can learn to be flexible.
-
Save
-
Save
Step 6: Add sealers
After applying the colour to your satisfaction the next thing to do is to use the sealer. Begin this method by applying your step two base over the whole nail.
Then apply a clean finishing powder over the whole nail. Following the powder application, you will need to paint a layer of finish over the entire nail bed. This layer of finish will help seal in the powder.
Step 7: The use of Activator, buff and finish look
One of the exciting parts of creating an ombre fall deep nails is the finish look, this finish look will be done by applying an activator to the nails. Make sure to apply it thoroughly over the full nails.
Also, Make sure to apply it thoroughly over the full nails, then wait for about three minutes for it to harden.
Using an activator helps your nails to dry properly and not get messed up. Then file your nails a bit more.
The next thing you want to do is to buff out the nail, once that is done, you can now clean the nail by washing them with alcohol wipes.
You can apply a coat of step 6 sealer over the entire nails and give it three minutes to dry. Voilà! your dip ombre nail is ready.
Conclusion:
It is quite easy and quick to create a dip ombre nail like a pro, To get better I suggest you practice on a swatch first before moving to actual nails. Because messing up the seal can ruin the whole look of the dip ombre nails to no return. .
As a lady that likes to keep her classy look in check you should know that your wardrobe is not complete without fall ombre nails.
And if you have by chance updated your wardrobe make sure to check on those fall ombre nails.
Full ombre nails is one classy trend no diva wants to miss, getting more familiar with ombre nails gives you an edge either as a service provider or as a person who does her nails at home either ways, the goal is to look beautiful and classy.
-
Save

